Are you planning a bathroom remodel and preparing for DIY demolition? If so, it might make sense for you to consider doing the demo yourself.
While it’s always best to hire a professional for such an important job, if you’re confident in your abilities and willing to put in the time and effort required, it can be done with relative ease. Let’s take a look at what you need to know before embarking on this project.
3 THINGS YOU SHOULD KNOW BEFORE YOUR DEMO A BATHROOM YOURSELF
1. Safety First!
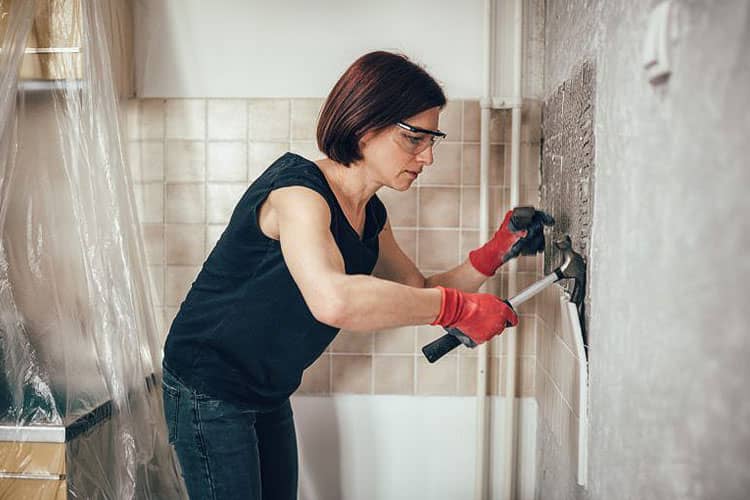
Before starting your demo, it’s essential that you have all the necessary safety equipment you’ll need. This includes rubber gloves, eye protection, dust masks, steel-toed boots, and long pants.
Additionally, ensure that any power tools you use are in good condition and that all safety switches are engaged when not in use. You should also check with your local building department or fire marshal to ensure that there are no additional safety requirements for demolition projects in your area.
2. Know Your Limits
You should also be aware of your own limitations when tackling a demo project. Unless you have experience working with plumbing and electrical systems, it’s recommended that these tasks be left to professionals who understand the complexities involved and can do the job safely and effectively.
Additionally, please think twice before attempting to remove tile floors or bathtubs on your own, as they can be extremely heavy and difficult to remove without proper equipment.
3. Prep Work Is Key
Once you’ve determined which parts of the demo will be handled by a professional contractor (if any) and identified what needs to be done yourself, it’s time for some prep work before beginning the actual demolition process. This includes disconnecting any water lines or electrical wiring from their respective sources as well as removing towel bars, mirrors, shelves, or other fixtures from walls before demolishing them.
Doing this prep work will help prevent unnecessary damage from being caused during the removal process. It’s also essential that you protect any surfaces not being demolished with tarps or plastic sheeting in order to prevent dust from spreading throughout your home during the project.
DIY BATHROOM DEMOLITION: WHAT COULD GO WRONG?
Taking on a DIY bathroom demo can seem intimidating at first glance, but if you take the precautions outlined above, it doesn’t have to be overwhelming!
With proper planning and preparation ahead of time, plus some basic knowledge about plumbing and electrical systems (or knowing when not to touch them!), it’s possible for anyone with confidence in their DIY skill set to tackle this project themselves — safely and successfully!
But if you’re still unsure and would like to know the potential risks involved in bathroom demolition day, keep reading.
3 WAYS DIY DEMOLITIONS COULD GO WRONG
When it comes to remodeling your bathroom, there are a lot of decisions to make. You have to choose the right fixtures, paint colors, and tile designs. But before you can get started on any of that, you must first take care of the demolition process.
While DIY demolition might seem like an easy process, it’s important to remember that there are potential setbacks that could occur. Here’s what can go wrong with a DIY bathroom demo and how to avoid them.
MISTAKE #1: Inadequate Preparation
Before starting the demolition process, you need to take several steps in order for everything to go smoothly. First off, you should make sure that all of the necessary permits have been acquired from your local municipality and that all safety protocols are followed.
Then, it’d be best to make sure that all furniture and other items are removed from the room so they don’t get damaged in the process. Finally, be sure to turn off the main water line as well as any electricity in order to avoid any accidents or disasters during the demolition phase.
MISTAKE #2: Not Knowing What Lies Beneath
Another one of the biggest mistakes homeowners make when it comes to DIY bathroom demolitions is not knowing what lies beneath the walls and floors they’re tearing up.
If you aren’t familiar with basic construction principles or plumbing systems, then it’d be wise to hire a professional contractor who can inspect things beforehand and advise you accordingly on what needs attention before starting your project. This can help prevent costly or dangerous surprises from popping up mid-demo.
MISTAKE #3: Poorly Executed Demolition Process
This is the last place many DIYers run into trouble: not properly executing a demolition process can lead to costly repairs down the line if not done correctly from start to finish.
- When demolishing walls or floors, be sure that you use proper tools such as hammers or crowbars instead of tools like axes or saws, which could cause more damage than necessary if used incorrectly or inappropriately on certain materials like drywall or wood boards.
- Additionally, be mindful of pipes when removing tiles, as they could easily be broken or damaged if not handled with care during removal.
- Lastly, double-check your work afterward by inspecting each area thoroughly before continuing to other areas, so nothing is overlooked while completing a demo job!
DIY bathroom demo projects can seem intimidating, but with proper preparation and execution, they don’t have to be! By following these tips for avoiding potential setbacks during your project’s demolition phase — such as inadequate preparation, not knowing what lies beneath, and poorly executed demolition processes — you’ll be one step closer to achieving success in transforming your space from outdated and dull into something fresh and modern!
And if you run into any problems with your San Diego DIY bathroom remodel, American Bathroom Remodelers is here to help. Contact us today for a free quote!